Hi everyone, I’ve been itching to share today’s project, It’s something I’ve been working on for a while and wanted to get it just right.

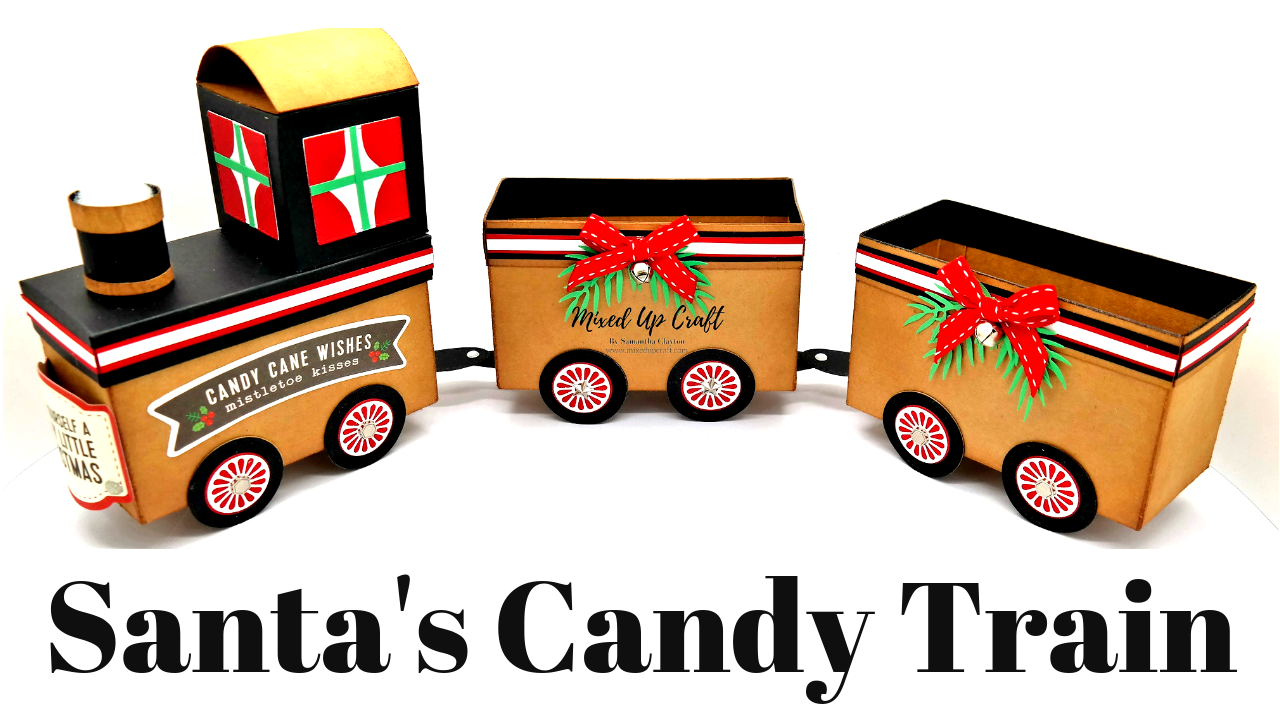
How cute is this!
I going to fill it with Candy Canes when I put all my decorations up.

I’ve kept mine to just the train and two carriages but you can add as many as you like.

Not only does it look good but it has lots of storage to and can be used to pop a gift in. This can easily be made for a little boy or girls birthday or baby showers.
I used my favourite Kraft Stax brown card by Docrafts

To make this you will need…
11″ x 8.1/4 cardstock, the amount you need depends on long you want you’re train. I used 3 pieces. 1 for the train and 1 for each carriage. Score along the 11″ side at 3″ & 8″ then score along the 8.1/4 side at 3″ and 5.1/4, then score at 2.1/2 & 5.3/4, again along the 8.1/4 side but just down to the first score line, then flip your cardstock so you have the other 8.1/4 side at the top and repeat the 2.1/2 & 5.3/4 scoring again.
1 piece of 5.3/8″ x 8.1/8″ black cardstock for the lid of your train.
Score along the short side at 3/4″, 1.1/2, 3.7/8 & 4.5/8
Score along the longer side at 3/4″, 1.1/2, 6.5/8 & 7.3/8
6 pieces of 3/4″ x 5″ Kraft card to reinforce the edges.
6 pieces of 3/4″ x 2.1/4″ Kraft card to reinforce the edges.
I then also cut 2 pieces of 3/4″ x 5″ and 3/4″ x 2.1/.4″ but in black cardstock to reinforce the insides of the main train box.
1 piece of 9.1/4″ x 6.3/4 black cardstock for your train tower.
Score along the long side at 2.1/4, 4.1/2, 6.3./4 & 9″
Score along the short side at 2.1/4 & 4.1/2
4 pieces of 1.1/2 x 1.1/2 white card for your windows
1 piece of 5.1/2 x 2.1/4 Kraft card for the arched roof on the train.
Score along the long side at 2.3/4 & 5″
1 piece of 3.1/2 x 1.3/4. Score along the long side at 3.1/4, and along the short side at 1.1/4
If you have a 1.1/2 circle punch that will speed up the next step.
You need 24 circles for your wheels in black cardstock, I then also punched another 12 circles the same size in kraft card to sandwich in between the two black circles to make the wheels really strong.
I cut 12 red 1″ circles to decorate the wheels along with another white decorative die which looked like hubcaps.
There are also some smaller pieces needed but they are optional and you may want to change them so it’s best to watch the tutorial.
You will also need some mini brads/split pins, ribbon, bells, embellishments etc to decorate.
Check out my full tutorial below.
The Candy Cane Wishes sign and the one on the front are from Pebbles Inc and available from Thompson’s Craft Supplies.

I added a little cushion stuffing to the Chimney to look like steam.

The hardware detail in the middle of the wheels is old Stampin Up embellishments.
This is an easy project to make with no specialist equipment needed, but it will take you the best part of a day!
Enjoy.
Sam
xoxo
You must be logged in to post a comment.