
Hi friends, today I’m sharing this handy DIY Storage Case that I’ve made to store all my 6 x 6 stencils in.

Many of you would have heard me moan about how my stencils where stored and how I wasn’t happy with it. So I decided to make some storage!

You can make this as big, or, as small as you like making it perfect to customise to your needs.

It’s a great project for using up those pattern papers you may have, or you can stencil your paper with the stencil that’s in the pocket. I did’t do this as I change things around all the time as I donate my supplies when I didn’t use them anymore, so I will be adding a label on each of my pages.
SUPPLIES USED TO MAKE THIS CASE
Snaps kit and pilers available here.
This looks like a newer version of my Royal Sovereign Laminator on Amazon.
Laminator pouches available here.
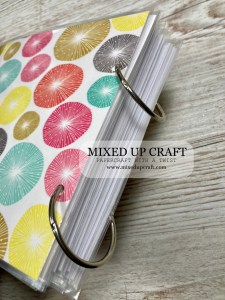
Binder Rings 40mm available here.
MEASUREMENTS NEEDED TO MAKE THIS CASE
1 piece of 6.1/2 x 8′ card for the front of the case.
1 piece of 6.1/2 x 11.5/8 card for the back of the case.
1 strip of 1′ x 6.1/2 card to reinforce/decorate the front closure section.
To make each page.
1 piece of 7′ x 6.1/2 card.
2 pieces of 4′ x 7′ pattern paper for front and back pockets.
1 strip of 3/4′ x 6.1/2′ card for the hinge part on each page.
Check out my full tutorial below to see how I made it.

I hope you’ve enjoyed today’s storage idea, look out for the bigger one I will be sharing soon.
Happy crafting
Sam
Disclaimer Some of the product links used are affiliated, these do not cost you extra but, by using them I will receive a small % of the sales which then help me to continue bringing you great YouTube tutorials. Thank you all for your support.
You must be logged in to post a comment.